However, it is worth noting that we have found a solution for the “DRIVER IRQL NOT LESS OR EQUAL NDIS.Sys” error in Windows 10 and we will tell you how to fix it down below. But it is also worth noting that this error is caused by a corrupted Network Driver Interface Specification or NDIS, and we will show you how to repair it.
How to Fix the “DRIVER IRQL NOT LESS OR EQUAL NDIS.Sys” error in Windows 10?
1. Change Hard Disk Policies
It is possible that if you enable write caching on your hard disk, it may solve the problem of corrupted NDIS.sys. To do this, follow these steps:
What is PageFile.sys, and Can you Delete it?How to Fix win32kfull.sys Failed Blue Screen Issue?Fix: Driver irql_less_or_not_equal Error in Windows 10/11
Press Windows + R to launch the Run window and type devmgmt.msc and hit Enter.
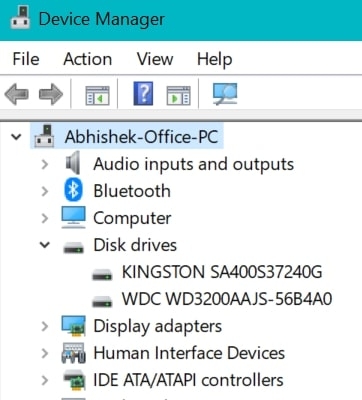
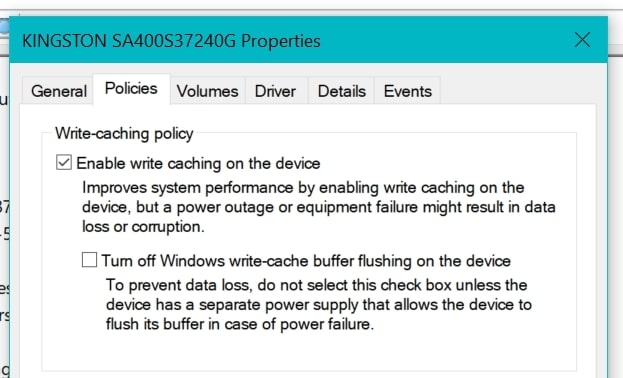
This will open the Device Manager window on your PC. Expand the Disk Drives and then right-click on your HDD/SSD drives.Now, click on Properties and go to the Policies tab.
Check the option to Enable Write caching on the device.Click on OK to save the changes and close the Device Manager window.
Now, you can restart your computer and see if the issue is fixed.
2. Perform Memory Diagnostics in Safe Mode
As we mentioned earlier, corrupted NDIS.sys could be the main reason behind this error, which is why we will perform memory diagnostics in safe mode to check if the memory is corrupted.
To do this, press Windows + R and open the Run dialog box. Type ms-settings:recovery inside the box and press Enter.
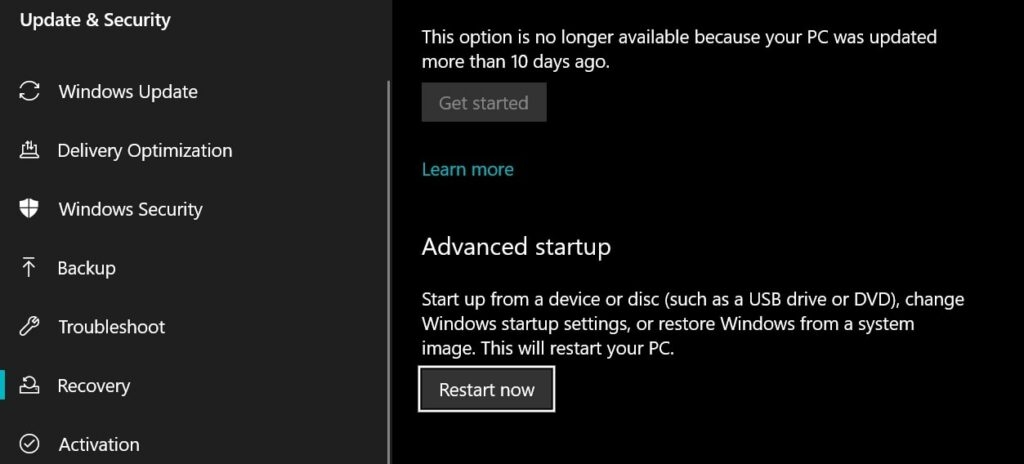
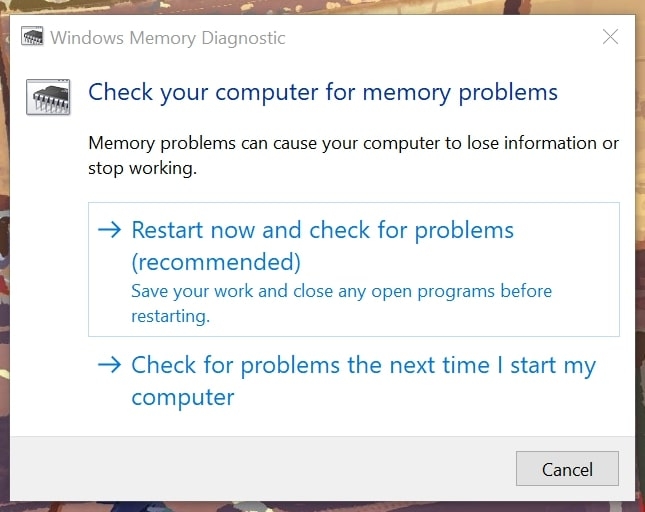
Now, go to Recovery > Advanced Startup and click on Restart Now.Click on Troubleshoot > Advanced Options from the options and then click on Startup Settings.Click on Restart, then press 4 to restart your PC in safe mode.Once your PC gets restarted in safe mode, open the Run dialog box by pressing Win+R.Type mdsched.exe and press Enter.This will open the Windows Memory Diagnostic window.
In this window, select the option to Restart Now and Check for problems (recommended)
Now, your PC will be restarted, and the system will check if there are any problems with your memory. If there are problems found with your memory, the system will try to fix them and solve your problems the next time you reboot your PC.
3. Perform Check Disk Operation
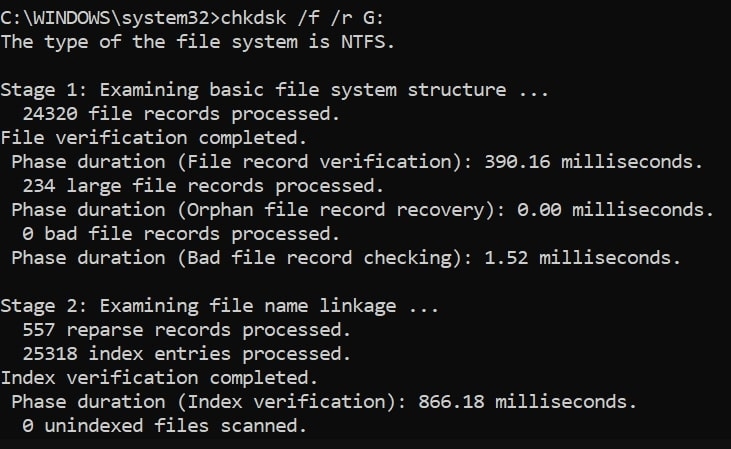
If you have found out that your memory is fine, then you should also check the disks on your PC to ensure they are working fine. To perform the Check Disk operation on your PC, follow these steps:
Click on the Windows button, type CMD, and click on Run as Administrator to open CMD in admin mode.Accept the permissions as prompted.
Now, type the following command in your CMD window:
Note: Replace the
Check all the drives on your PC one after the other and see the results.Reboot your PC after all the drives have been checked, and your problem should be solved by now.
4. Run System Restore
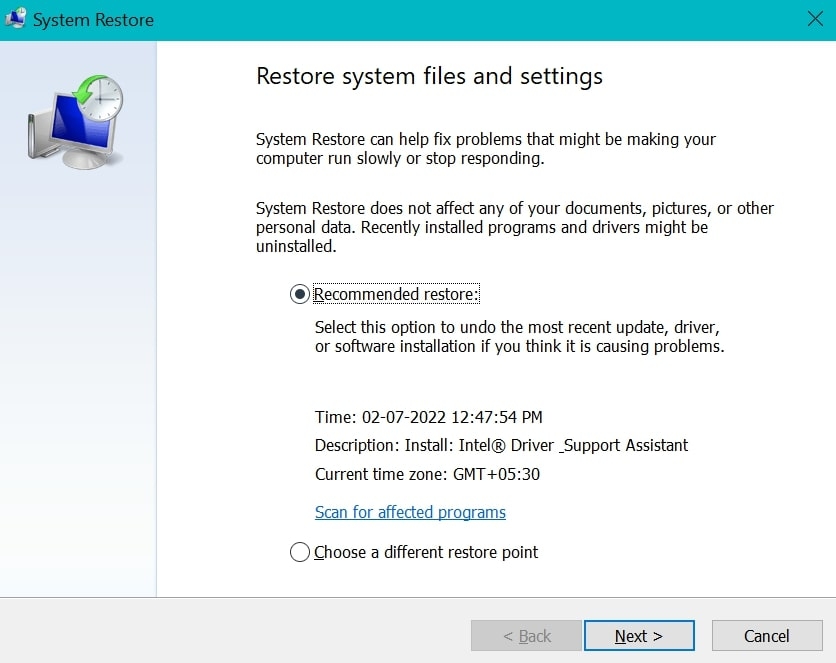
If your issue is still not fixed, then the last option is to revert your system to a point where everything is working fine. Basically, this is known as System Restore, and Windows already creates System Restore points on the PC so that you can revert back to it if something goes wrong. To go back to a System Restore point in the past, follow these steps:
Go to Windows Start Menu, type Control Panel, and open the first result.Now, go to this path: Control Panel\All Control Panel Items\Recovery by copying and pasting it into the address bar at the top.
Click on Open System Restore, and you will be shown the best system restore point for your PC.If you are fine with it, click on Next and follow the on-screen instructions to restore your system to that point.Note that if you have made any changes to the system after the system restore point was created, those changes will be lost.
But we are sure that this will fix all the issues you are having, which is why we recommend you restore the system to that point.
Conclusion
This article explained everything regarding the “DRIVER IRQL NOT LESS OR EQUAL NDIS.Sys” error and how to fix it on Windows 10. We hope that this article was easy to follow for you and you were able to solve this problem on your PC once and for all. With this, share the article with your friends and family and let them know about the fix to this issue for their PC.

